Set up contact form emails
Send contact form submissions to the right inbox, and optionally email the visitor a confirmation.
Easiest way: ask the agent
Open the Website Agent, pick your site and tell it where leads should go.
- "Send contact form submissions to frontdesk@mybusiness.com."
- "Also send a copy of every lead to owner@mybusiness.com."
- "Email visitors a short thank-you after they submit the form."
- "Add a Budget dropdown to the contact form with 3 options."
Prefer Claude, ChatGPT or Cursor? You can connect your own AI and ask it the same things.
Before you start
Pick the inbox that should get new leads. This is usually the business owner, the front desk or a shared sales inbox. Submissions are also always saved in WP Admin > Submissions, so nothing is lost while you set this up.
Do it yourself in WordPress
Set up the owner email
-
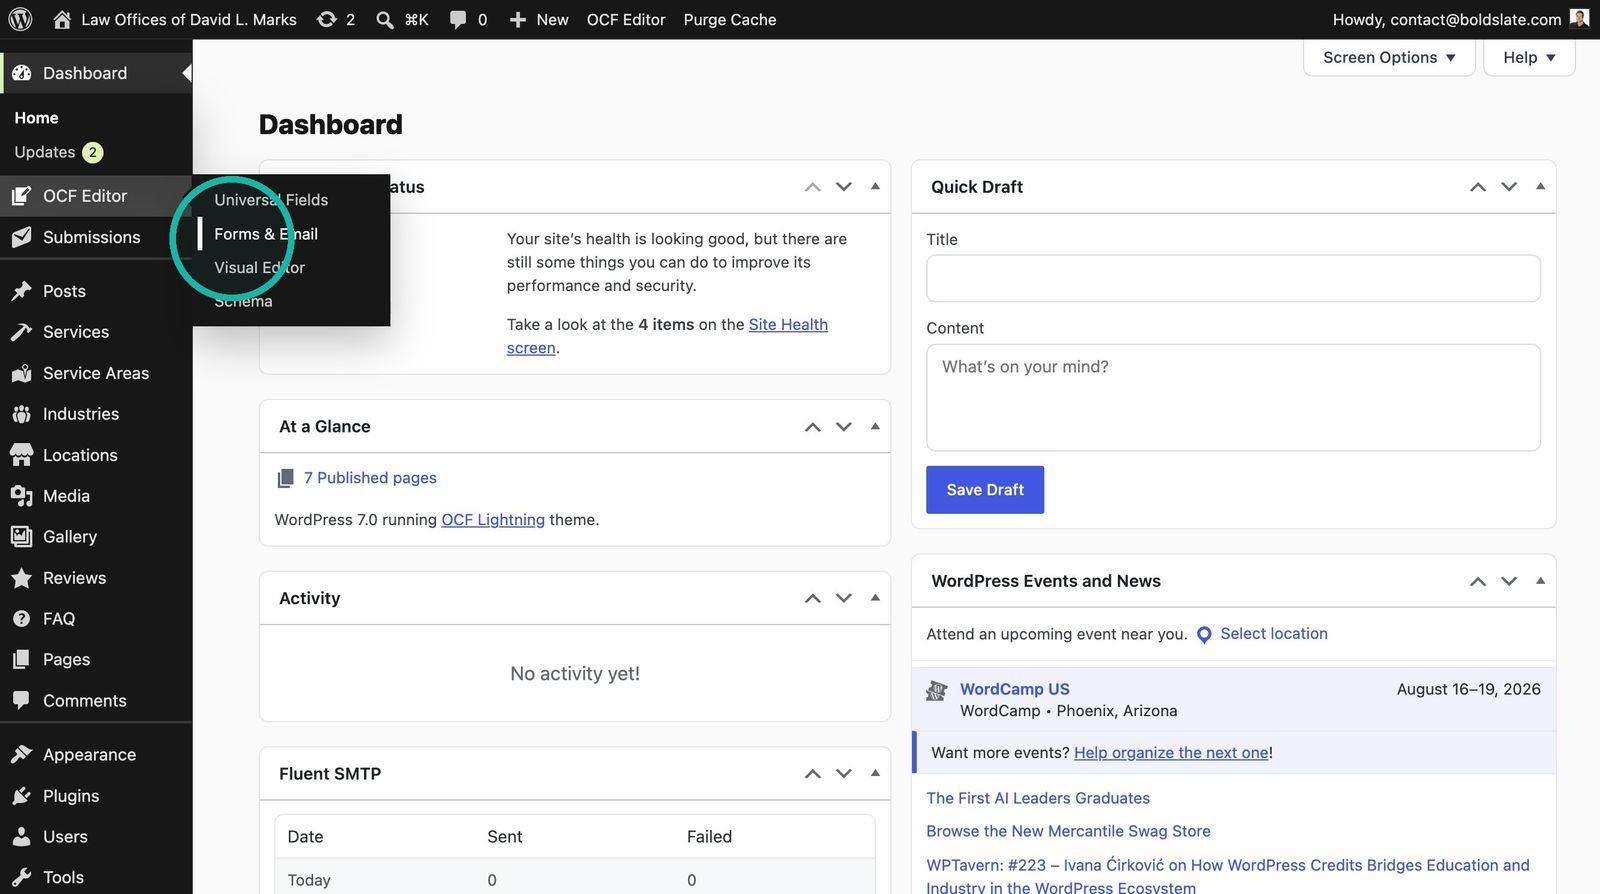
Open Forms & Email In WP Admin, hover over OCF Editor and click Forms & Email.
-
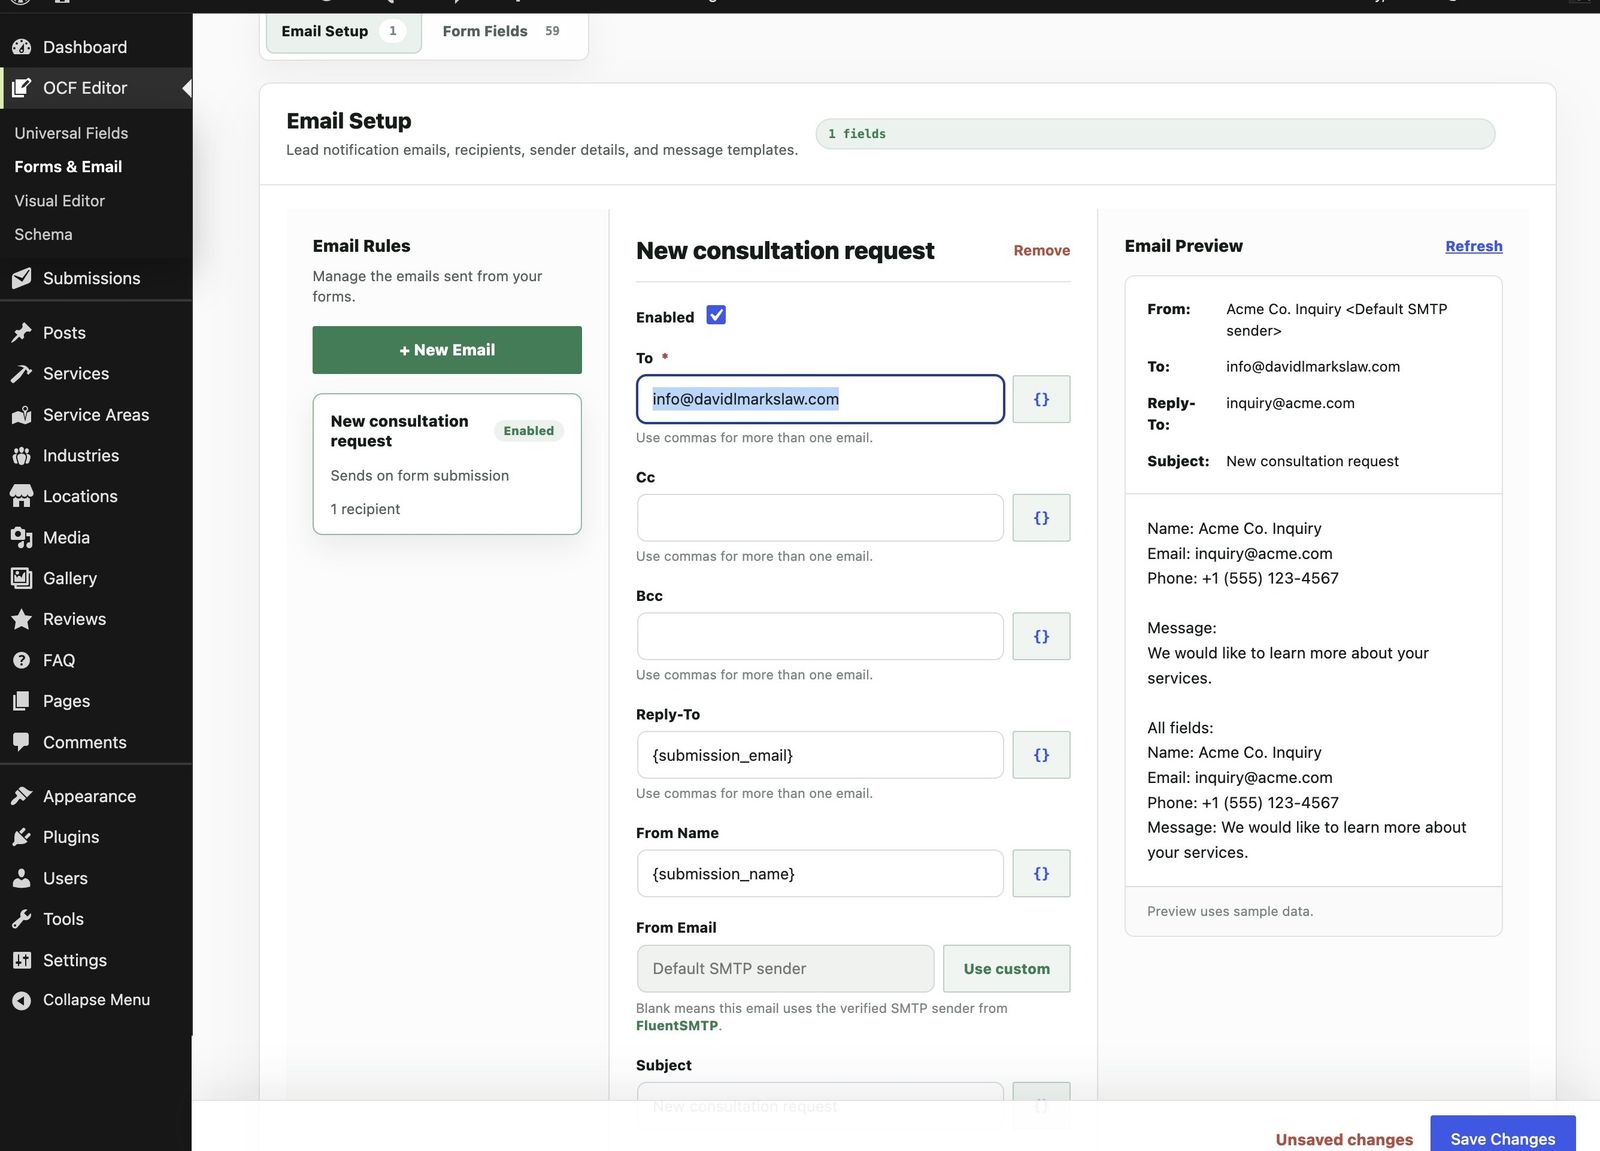
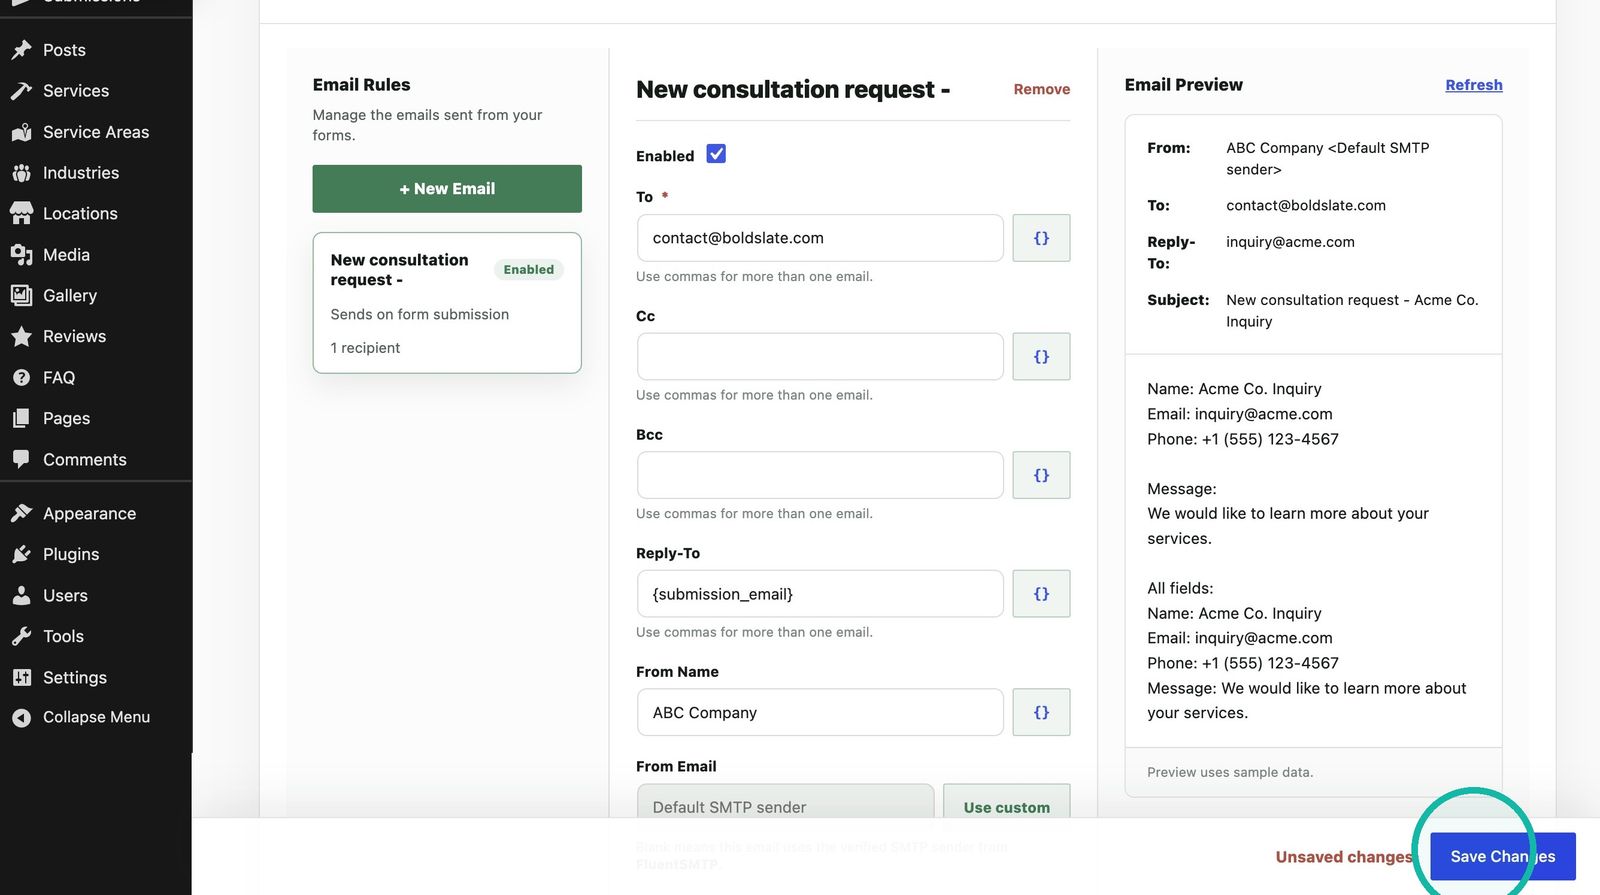
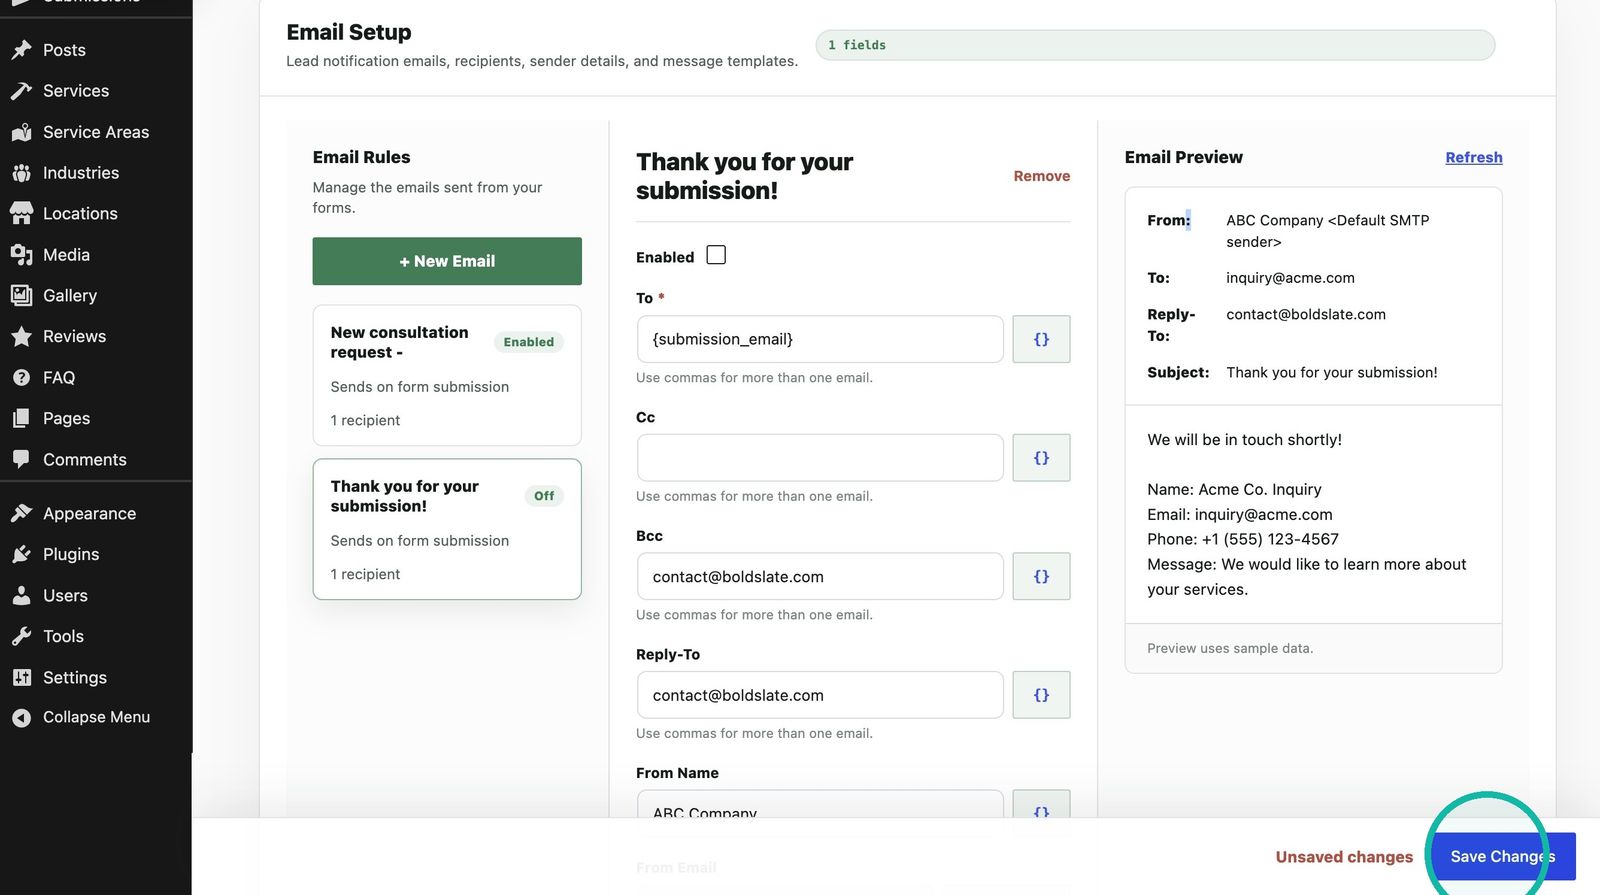
Turn on the owner email Tick Enabled on the first email rule, then set To to the inbox that should get submissions.
-
Send replies to the visitor Set Reply-To to
{submission_email}with the dynamic data picker, so hitting reply goes straight to the lead.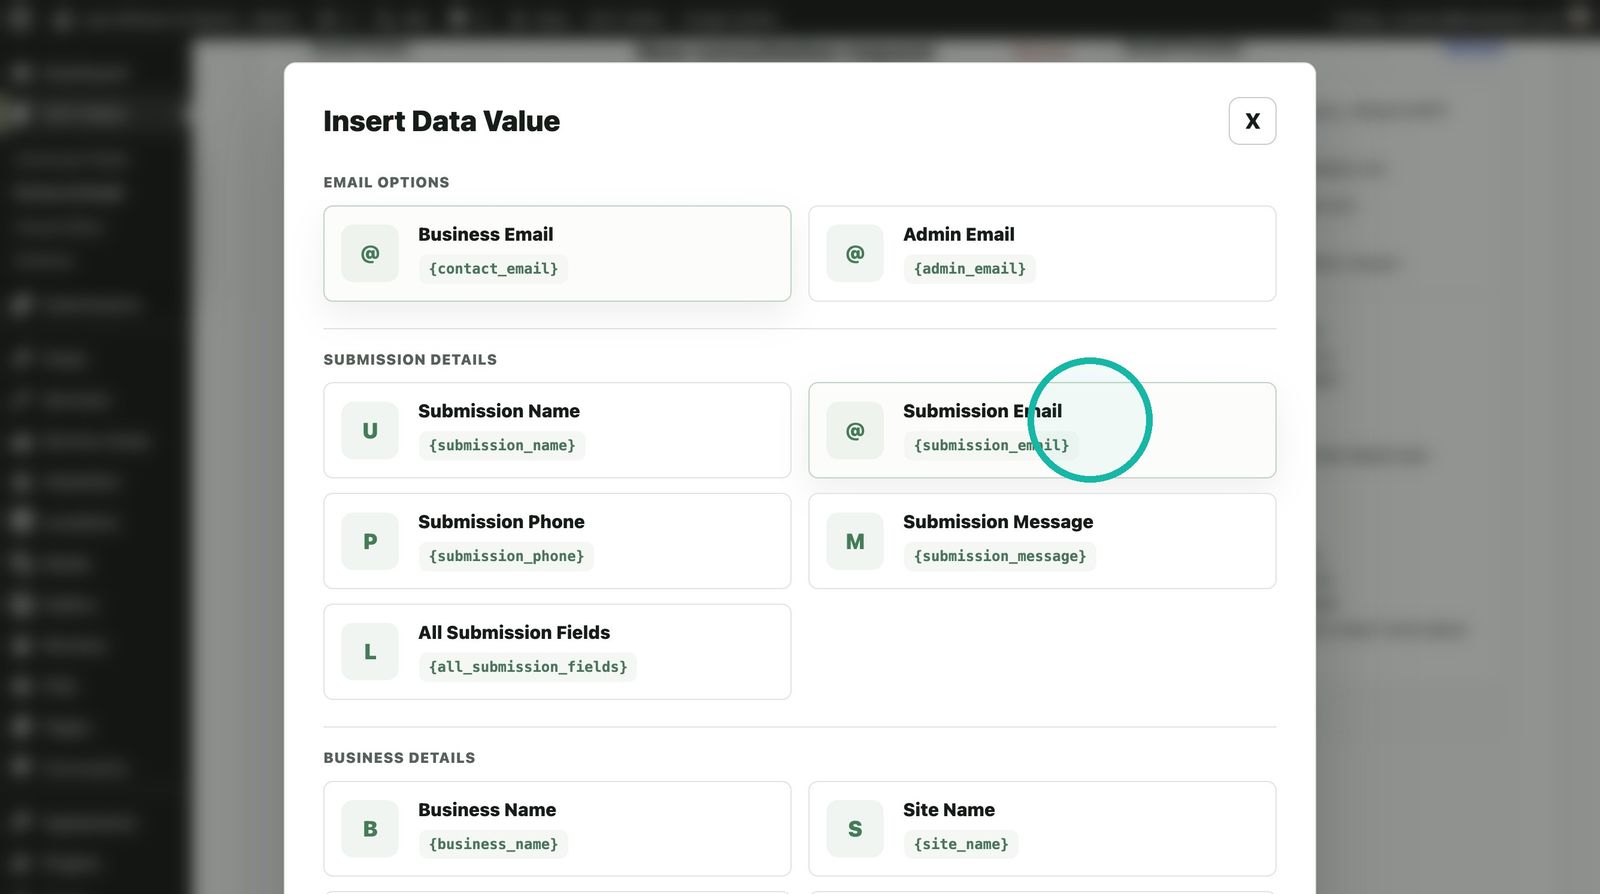
-
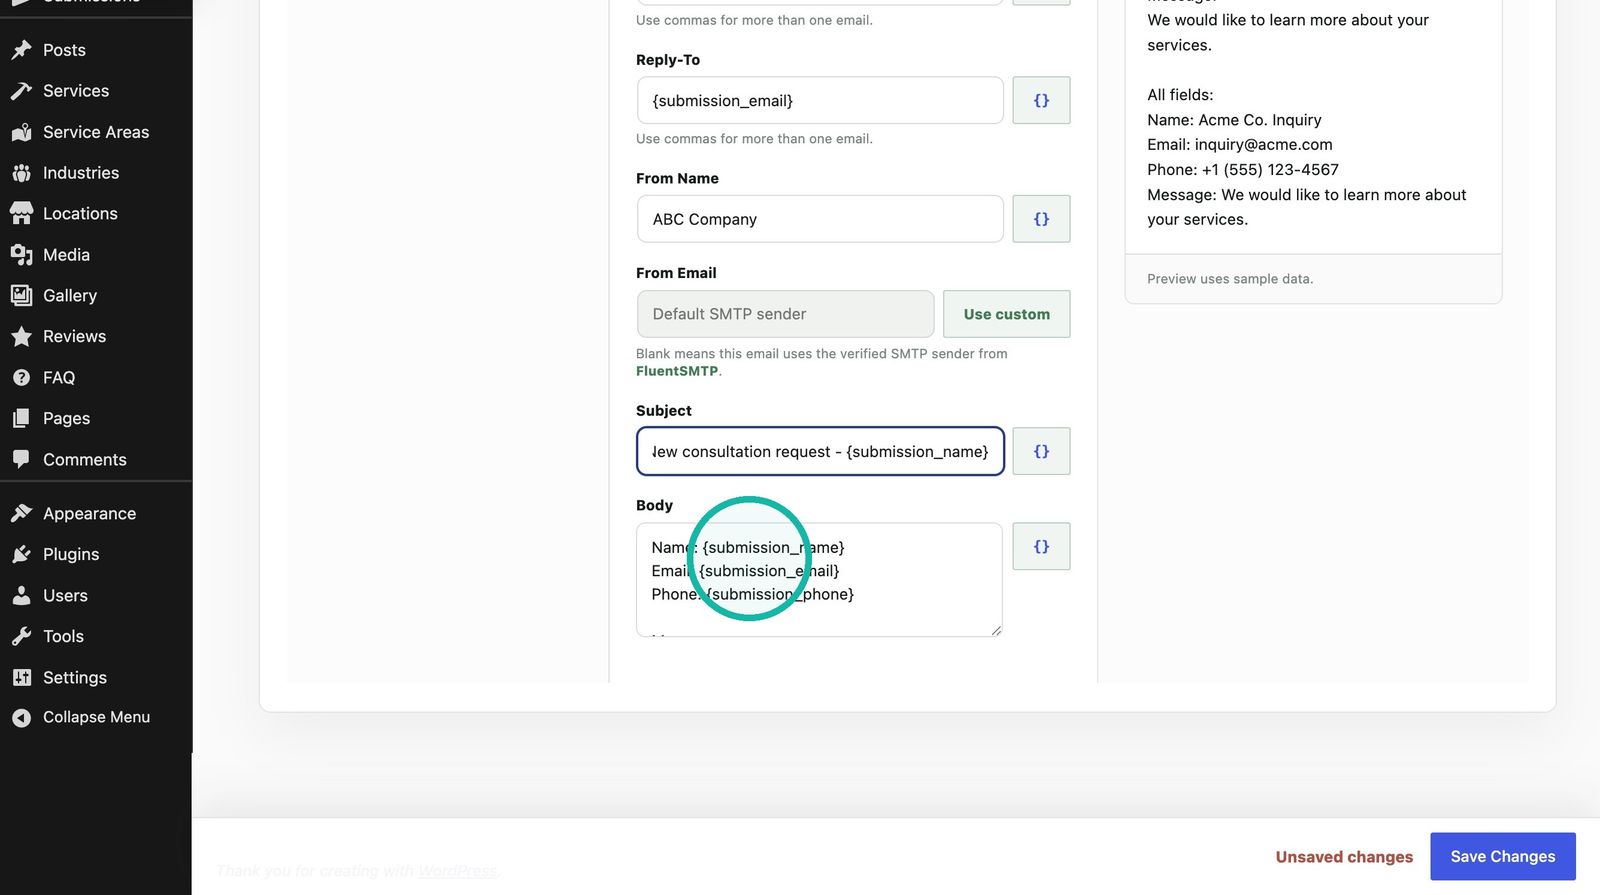
Name it and save Update From Name and Subject, check the preview on the right, then click Save Changes.
Good to know: if you moved your site to your own hosting, set up SMTP first or emails may not arrive. See Set up SMTP with FluentSMTP.
Send a confirmation to the visitor
This is optional. It sends the person who filled out the form a quick "we got your message" email.
-
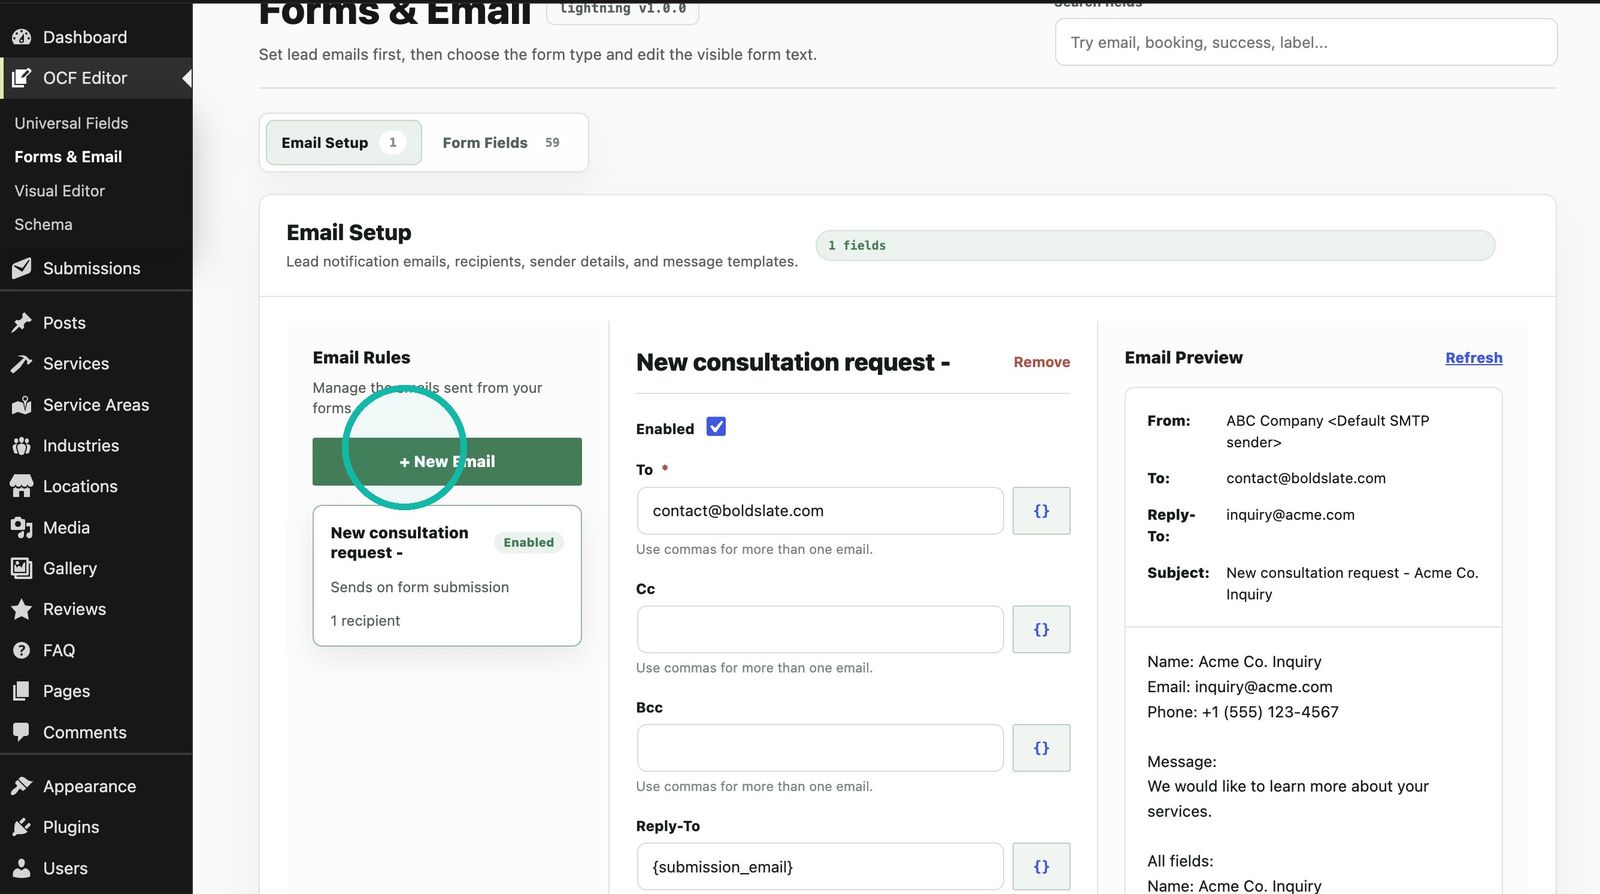
Add a second email Click New Email.
-
Send it to the visitor Set To to
{submission_email}with the dynamic data picker. To also send yourself a copy, add your email in BCC.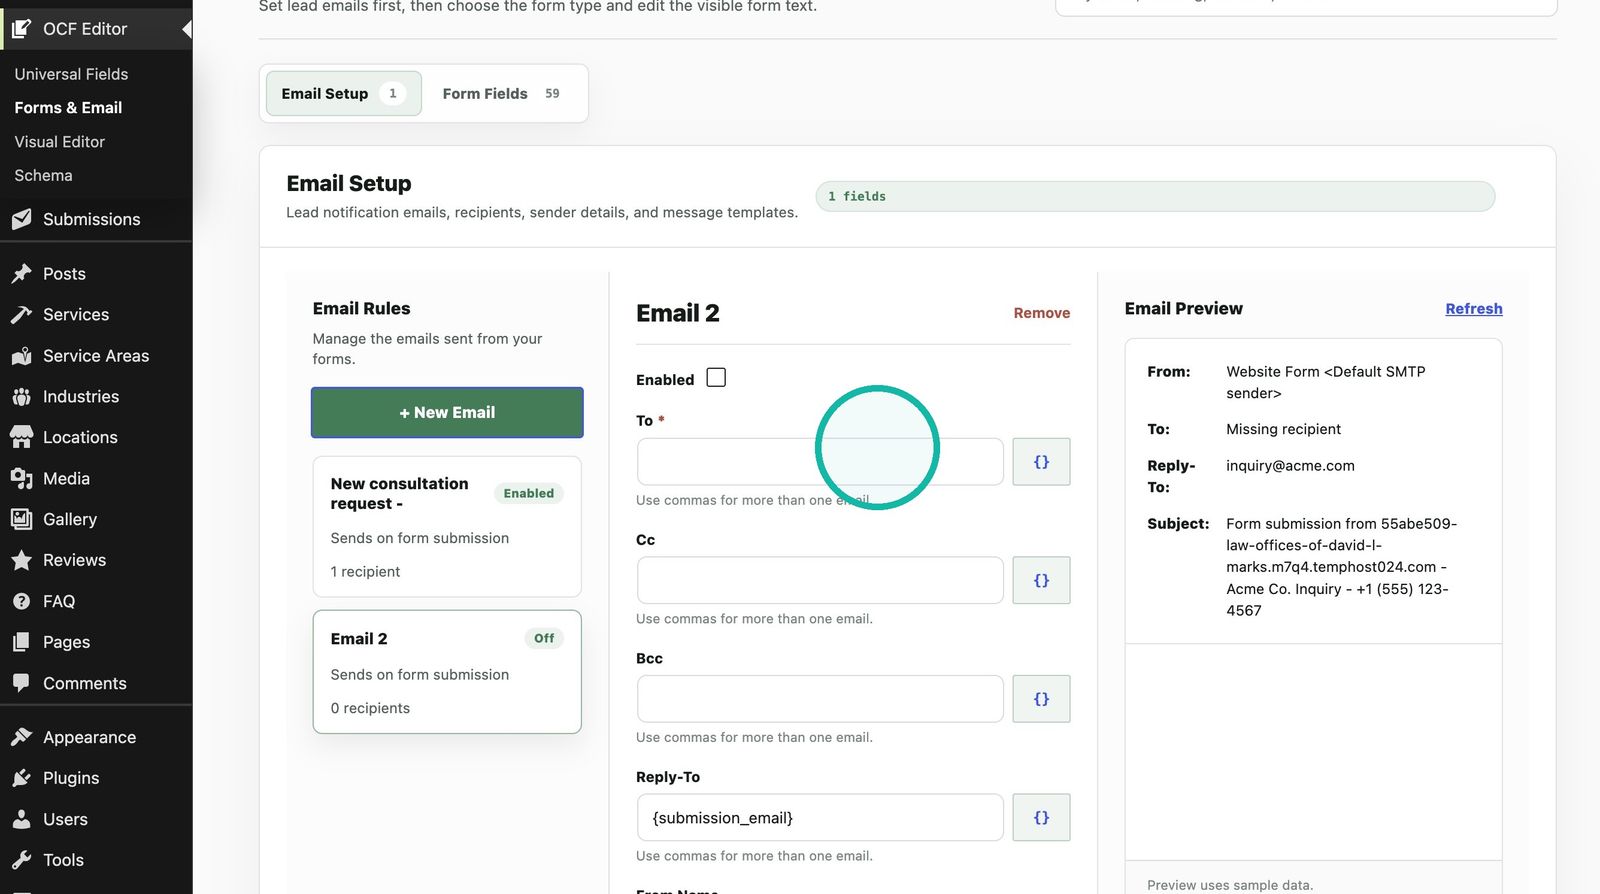
-
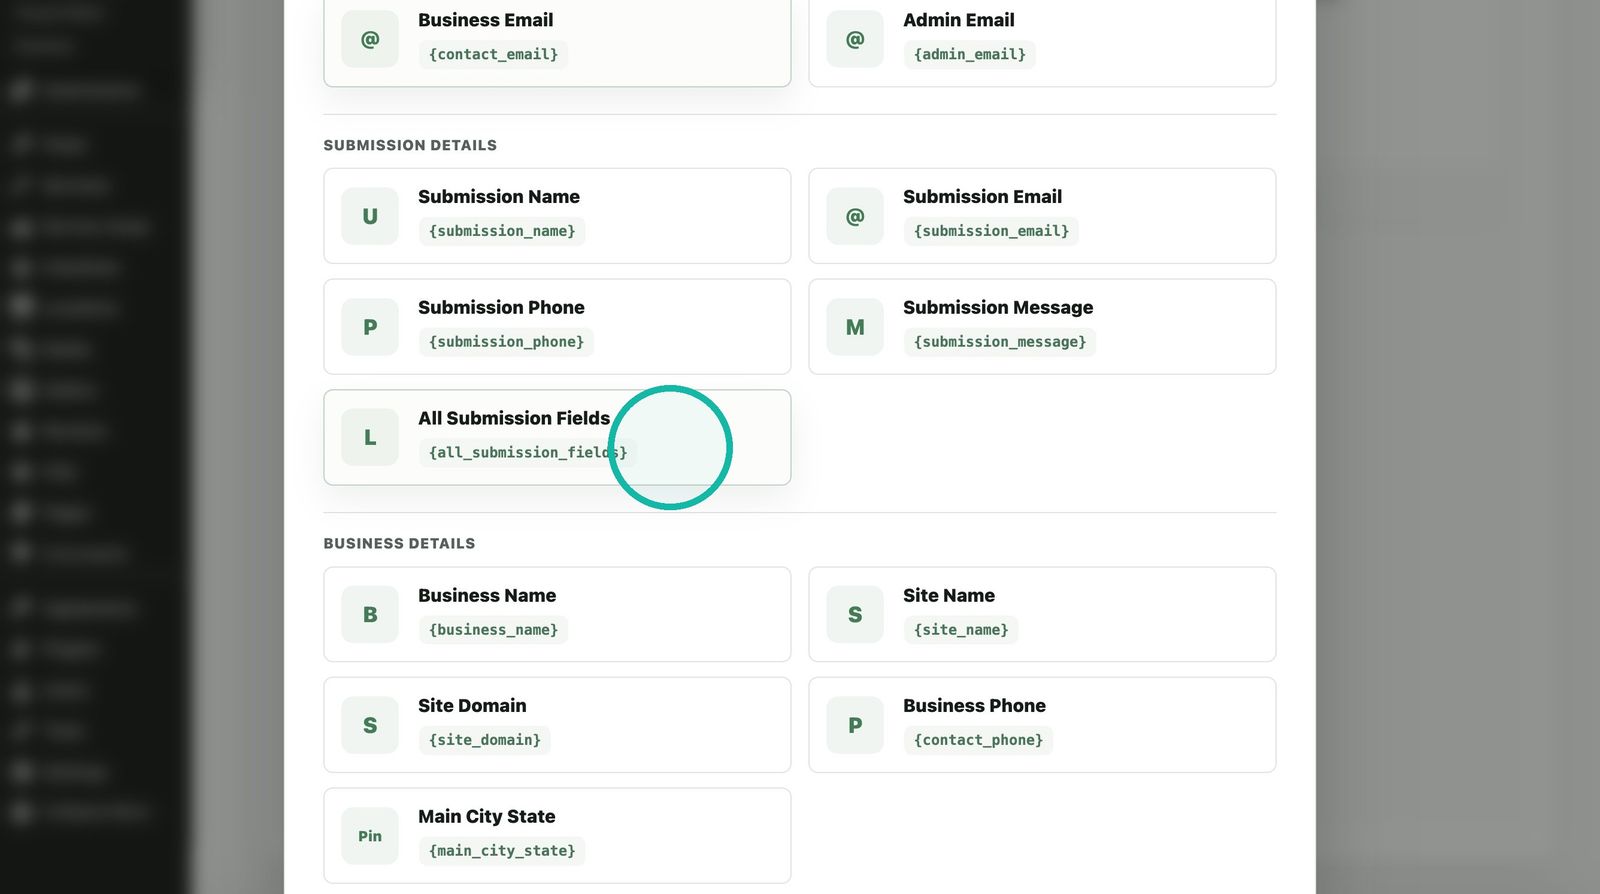
Write the message Set the From Name, Subject and message. You can use dynamic values like the visitor's name.
-
Turn it on and save Tick Enabled, then click Save Changes.
Use a custom sender
Also optional. Only do this if you've set up your own SMTP sender.
-
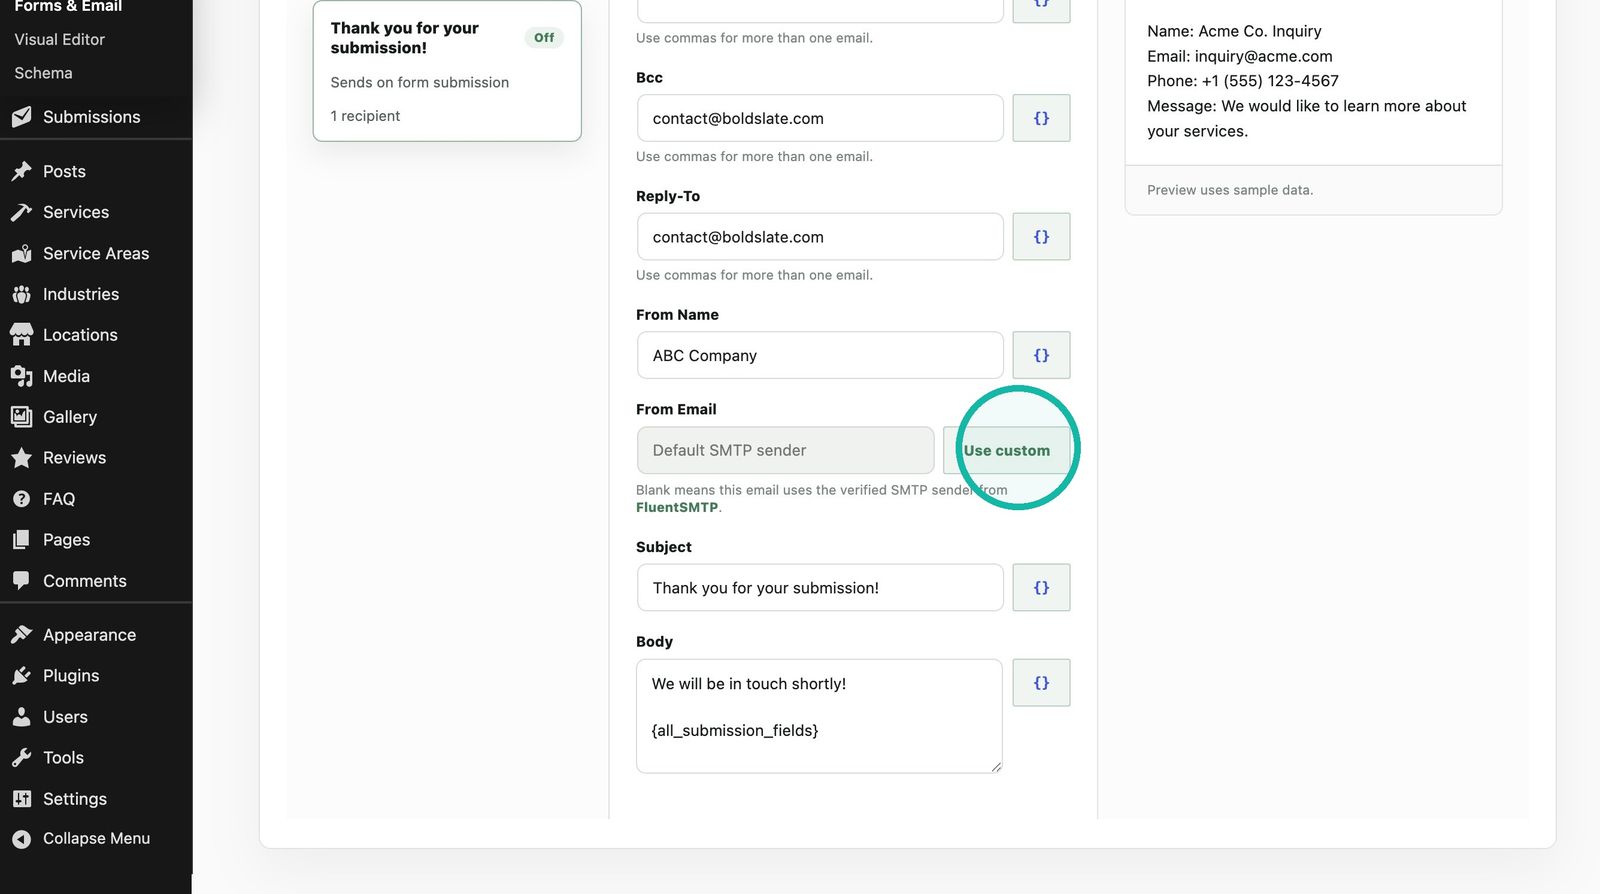
Choose Use custom Click Use custom on each email rule that should send from your own address.
-
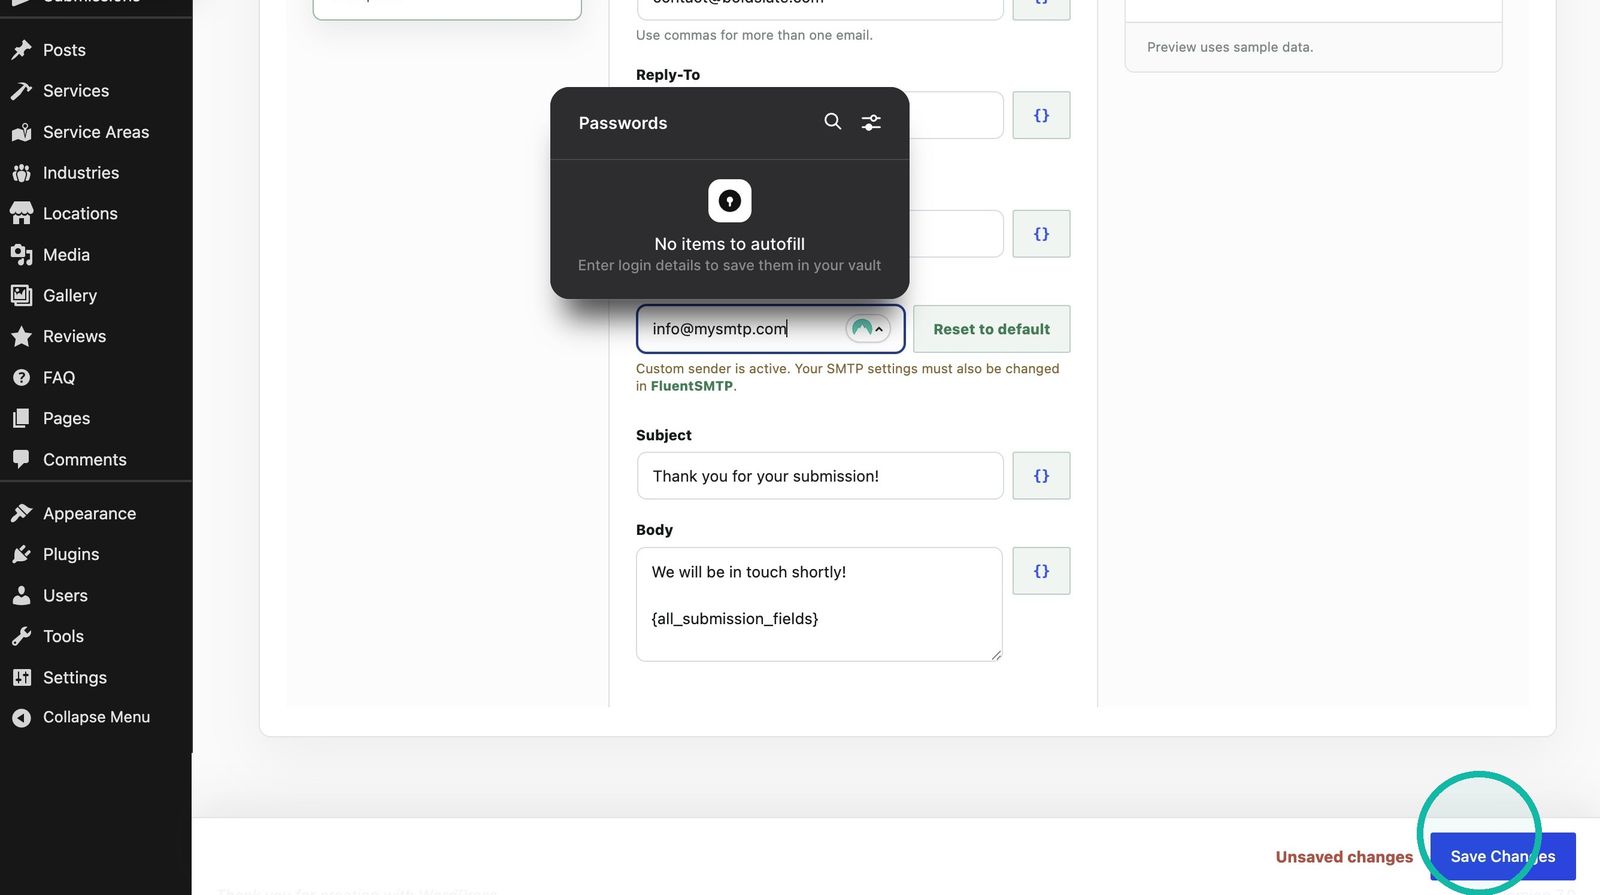
Enter your sender address Enter the From Email you set up with your SMTP provider, then click Save Changes.
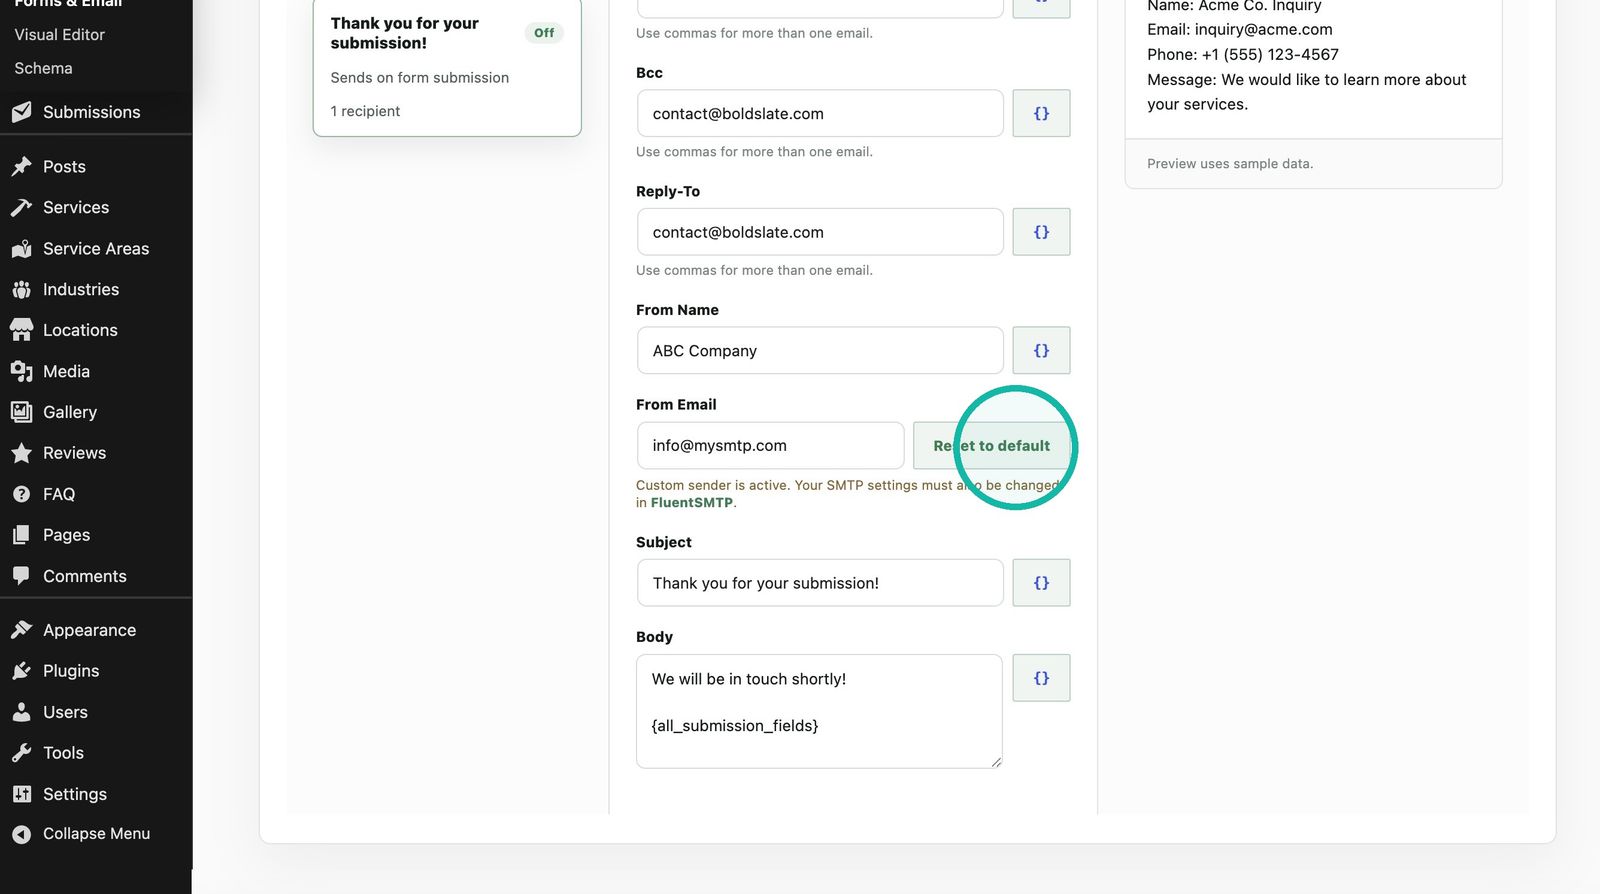
To go back to the default 1ClickWebsite sender, click Reset to default and save.
Test your form
Submit a test entry on your live site. Check that the owner email arrives, and the visitor confirmation too if you turned it on.
Troubleshooting
- Nothing arrived: check spam or junk first.
- Still nothing: confirm Enabled is ticked and the To address has no typos.
- Moved to your own hosting: set up SMTP with FluentSMTP.
- Still stuck: chat with us and we'll check your site's email setup.
Still stuck?
Chat with us and we'll reply right here, usually in a few minutes.